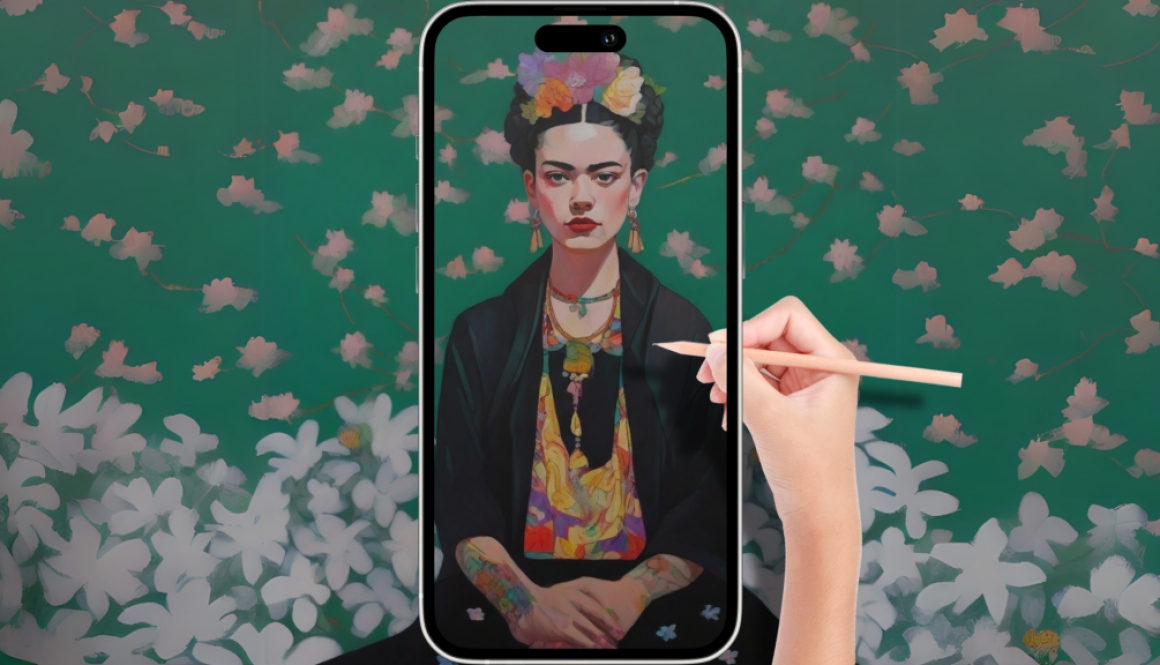
We just launched a trial of our new Mural Maker 2.0 features! To use them please make sure both of your devices are up to date with the most current version on the App Store. To do this you can look up Mural Maker on the App Store with both devices, or just click the below link. If it says “Update” press update, otherwise you are good to go!
In order to use 2.0 mode or switch back to 1.0 mode… You can do that at any time by going to the main screen of the app, pressing the menu button in the top left corner, and then pressing Try Mural Maker 2.0 or Use Mural Maker 1.0. You will know you are in the 2.0 mode because at the top of the screen it will have the Mural Maker M logo with a 2.0 next to it. See the Gif below!
How much is the Da Vinci Eye app? Da Vinci Eye is FREE to download for iOS with the option to upgrade to a pro-version that has additional features. For Android Da Vinci Eye is currently $9.99, but we will be Android switching over to the same model as iOS soon. For both versions of the app, if you do not like the app for any reason you can also get a refund! There is no risk to trying it out. You can also see the price and cost of Da Vinci Eye in your local currency by going to the App Store or Play Store.
What does the Da Vinci Eye App Cost?
We charge a small fee because we are constantly adding new features, updating the app to make it run smoother, creating instructional videos, and keeping it up to date with current Apple and Google’s policies and security improvements. We also have incredible customer service and usually respond right away to any questions. We are a super small team of just two people at the moment and charge a very small fee to allow us to continue to work on the app full time.
We get this question all of the time! For some reason when you search in Google it pulls information from our other app. This is causing a lot of confusion, so we’re setting the record straight writing a blog article that will hopefully overcome the wrong answer that is being shown by Google. The price of Da Vinci Eye is $9.99 for Android, and free for iOS with the option to upgrade. Which if you take into consideration the price of other art supplies, it will be probably the cheapest and longest lasting tool you will ever buy. Da Vinci Eye costs $9.99 for Android and is free for iPhone and iPads with the ability to upgrade to get full access to the app. If you buy a pad of good paper, or a set of decent drawing pencils, or even tubes of paint… all of are less than the price of the app AND you will need to purchase them when they run out. You won’t find a better deal for a more. useful tool!
Is Da Vinci Eye app free? Da Vinci Eye is free on iOS with the ability to upgrade to a pro version. It is not a completely free app. Da Vinci Eye costs $9.99 for Android, and is not a subscription. The price for Da Vinci Eye: Pro Upgrade is currently $19.99 per year, which is less than a cup of coffee per month. You may want to check back though as sometimes we have sales!
So as you can see the Da Vinci Eye app is $9.99 for Android and free to download for iPhone and iPad with the option to upgrade, which is $19.99 per year. The other great thing is that if you don’t like the app for any reason you can get a refund! Just email us at info@DaVinciEyeApp.com and we’ll shoot you over how to do that right away.
If you want to make larger artwork you can do that several different ways…
The most basic way is to press the “Move” button, select image, and enlarge your reference image relative to the size of your camera. This will make the image bigger on your paper.
Also, the app works like a traditional projector where the higher up you place your phone the bigger the image will be. You can place your phone higher above your paper by using a taller glass, shelf, box, or stand. You can draw very big like this, however if you place the phone too high it becomes impossible to draw because you can’t see the screen and reach the paper.
Here is a video of the Golden Canvas using making painting on a large canvas using classic mode:
If you are making artwork on a vertical surface like a canvas or wall you can follow the same approach using AR mode. The bigger you make your anchor the further away you can have your phone or tablet away from the surface. Again, though the problem is that the further away you have the phone the harder it is to draw and look at the screen at the same time.
You can also fill in smaller sections in a larger piece of artwork, for a lot of artists the app is used to place certain smaller elements on a larger canvas. You don’t always need to have the whole canvas captured with phone.
Expanding on the ideas above you can broadcast your phone’s screen to another monitor using Air Play, an Android screen mirroring app, or an hdmi cable so you can have your phone as far away from your drawing surface as you like and still be able to draw by looking at a different screen. This does require a little bit of extra setup but is very effective. Here is a quick video I made how to accomplish this.
Airplay / Screencast method:
We also just launched a new app called Mural Maker for iOS, that actually simplifies this process. You can check that out here:
The easiest way, and the way that I use, is that I just make my drawing in sections. Simply move the phone to where you want to draw on your paper. This way you can technically make drawings of any size! Check out this video:
This is a much more detailed video of how to above:
If you want clarification on any of these methods I would be happy to send more videos, set up a video call, or give you any other kind of instructions you would like.
Also, if the app is not working out for you we can let you know how to get a refund. We want you to be 100% satisfied with the app!
Before you start drawing in AR Mode, you will need to create an anchor.
In this case, the anchor is part of a playing card. An anchor literally anchors your digital image to the same position of an object in the real world. As long as the anchor stays in view of the camera, Da Vinci Eye will know where to place your digital reference image.
To make an anchor press Tools, select the AR menu, press Anchors, and then + Make Anchor.
Now, press Take Picture. Here, you take a picture of your anchor.
Next, crop the image so it’s just the anchor. You don’t want the surrounding area visible.
Finally, you need to enter the approximate height and width of your anchor. Da Vinci Eye will automatically calculate the second dimension. If you input the width, it will automatically calculate the height. You can also change the unit of measure from inches to centimeters.
Now, if your anchor is in view of your camera, your reference image will be a superimposed relative to its position.
When you are drawing, it’s a good idea to tape the anchor in place. That way it doesn’t move around. You can hold your phone in your hand while you draw, however, this is very difficult and not recommended.
We do highly recommend suspending your phone above or in front of whatever it is you’re drawing on. For example, you can place your phone on top of a tall glass. If your phone doesn’t have a case, it may slide around. To stop the phone from moving around, just place two cut rubber bands on top of the glass.
You can also buy or make a stand. This is a cheap microphone boom stand and a cell phone holder attachment. With this setup, you can easily draw using an easel. You can check out these two products in the Product section of the app.
You may notice the phone’s camera going in and out of focus. It is set to auto-focus by default. Once your anchor and drawing surface are in focus, you can turn off auto-focus by pressing Tools > AR > Focus Lock. This will turn off auto-focus.
To position your reference image on the paper. You should pinch the screen to bring the full camera feed into view. Then press the Move button to move your image relative to the anchor. You can enlarge, shrink and rotate the image.
Make sure to unpress the Move button when you are finished. This locks the reference image in place.
You can now move and zoom the camera without moving the reference image. Press the Opacity button to adjust the transparency of the reference image. To make the image more transparent, move the slider to the left; to make it more opaque, slide it to the right.
You can also stylize images by using Filters, or break down images into layers by color value by using the Breakdown feature. You can learn more about filters and the breakdown feature by going to the Learn section of the app.
Now it’s time to start drawing!
First, trace the important parts of your reference image. Don’t forget, you can zoom in and out without disrupting your drawing to get the fine details, then add the finishing touches by adjusting the opacity all the way up and using the Strobe feature to compare the reference image to your final drawing.
To learn more about individual features, try completing the challenges on the home screen, and also check out the Learn section of the Da Vinci Eye app.
As always, if you have any questions about AR Mode, feel free to contact us at info@davincieyeapp.com or by using the email button at the bottom of the home screen.
—
You can also check out our video on how to get started with AR Mode below, or subscribe here for more tutorials.
To start off with, we’re going to use an image with a lot of shadows in it.
We’re going to magnify an image a little bit for this tutorial.
Using Da Vinci Eye, it’s really easy to put lines down on your paper that match where things should be in your drawing. But if you’ve ever tried to shade your drawing or use it to reference where shadow should go, that becomes a lot more difficult.You end up not being able to tell the difference between what’s the reference image and what you’ve shaded. You also can’t tell how dark or light you shaded something in, in comparison to their references.
To fix this, we use the Strobe tool. The strobe tool fades the image in an out, and this lets you see the difference in the shadows.
The goal when you are drawing in this mode is to try and get what you are drawing to look indistinguishable from the reference picture. So when the image fades in and out, you should stop being able to see a difference.
You can use the speed slider to make the image fade slower, or you can make it fade faster, whatever works the best for you.
And that is how to use the strobe feature to make realistic drawings with Da Vinci Eye!
If you haven’t already, check out the app! It’s available on iOS and on Android. If you have any questions whatsoever, please reach out via email. You can use the email button in the app or directly at sam@davincieyeapp.com.
And as always, if you make something cool, please tag us. We would love to see it. We’re on all the social medias: Instagram, TikTok, Facebook, Twitter. Find us, follow us, and tag us. We’re at @DaVinciEye or @DaVinciEyeApp, and we’ll even repost your work.
One more thing… Make sure that you have your notifications turned on or subscribe to us on YouTube, so that way you can get notified for when the next lesson drops.
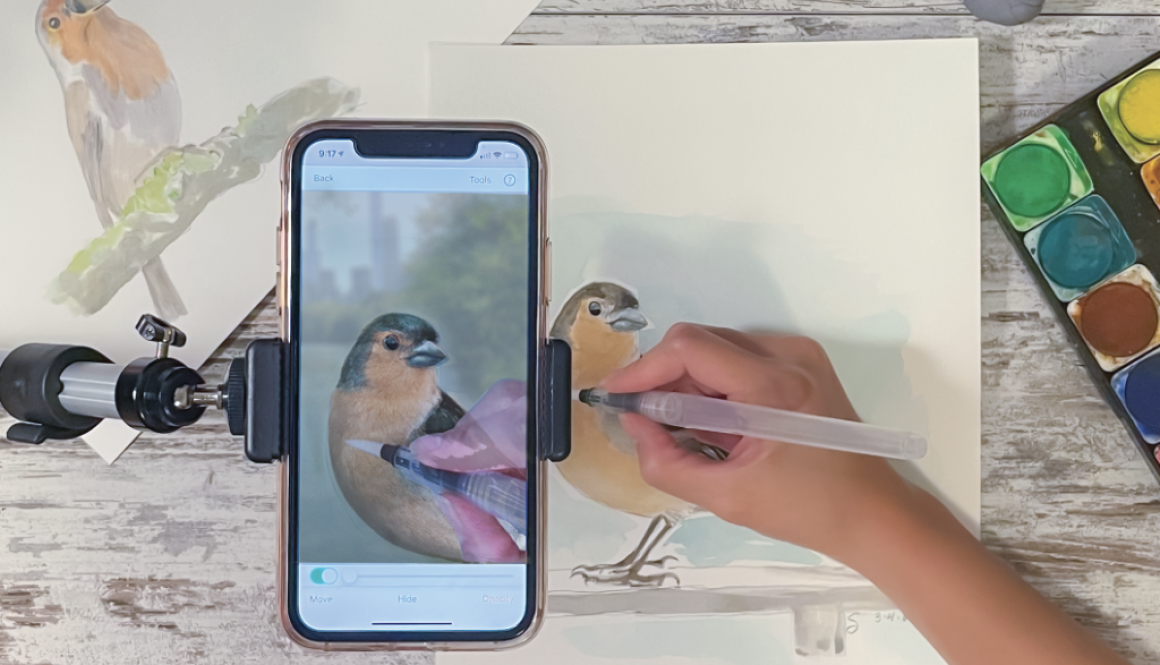
This drawing mode uses your phone’s camera feed and lays a transparent picture you want to draw over that camera feed. If you look at your phone’s screen, you’ll be able to see both the picture you want to draw and the place where you want to draw it at the same time. This lets you easily trace an image onto any surface.
To get started, you need to place your phone on top of a tall glass.
If your phone doesn’t have case, it might slide around when you touch it. This will make adjusting settings while you’re drawing very difficult. To fix this, cut two rubber bands and place them on top of the glass about an inch apart. This will stop the phone from moving around.
You can position the phone any way that is easiest for you to draw. If your phone is positioned to the left or to the right, you can reorient the toolbars by tilting the phone upwards.
You should make sure you can see both the feed from your camera and the transparent image you want to draw. If your camera feed is black, you might need to go into your phone’s settings to make sure Da Vinci Eye is allowed access to your camera.
Now it’s time to position your picture on the paper. Press the move button, and using one finger you can pan the image…
Using two fingers, you can zoom, shrink and rotate the image.
When the move button is unpressed the image and the camera will be locked together. This lets you zoom out to see your drawing as a whole or zoom in, so you can draw fine details.
Finally, to make your image more or less transparent, you can use the Opacity slider.
Move the slider to the left to make your picture more transparent and to the right to make it less transparent.
Check out our Learn section to watch Da Vinci Eye instructional videos:
Or try completing the challenges at the top of the home screen to learn things like: How to record time lapse videos of your drawings, how to add filters to pictures to make them easier to draw, and how to use advanced features like the strobe to make super realistic drawings.
As always, if you have any questions or need any help, shoot us an email using the email button at the bottom of the home screen.
You can also check out our video on how to get started with Classic Mode right here:
Hey guys! My name is Sean, and I’m an artist/instructor with Da Vinci Eye. Because it’s the holiday season, we are going to learn how to draw an elf!
I’ll be drawing this on my tablet for you to easily see, but feel free to use a pencil and paper. You can also follow along with the tutorial step-by-step using Da Vinci Eye for iOS and Android. The app lets you trace along with my drawing to help become more comfortable and understand exactly what I do.
Let’s start this drawing out with three circles to help us shape up the body.
I’m using simple shapes of ovals and rectangles to block out the body, torso, the arms and the legs.
As you know elves have pointy ears and pointy shoes. So I’m going to start with the bottom and put in two curled shoes.
Next, we can draw out the clothes. I added some triangle ends and buttons to a shirt for detail.
With a round of face, we can put in those 2 pointed ears we talked about earlier.
The face doesn’t need to be super specific, a happy smile, and two elbows for eyes can totally work.
To finish out the body, we can put in the arms and some mitten hands for those cold winter nights.
Last is the big warm hat…
This is also a great time to add in some shading and clean up those initial sketch lines you put in.
And as always… Remember to sign your art because you did a great job!
If you want to find more of my art, follow me on Instagram at @Phoenix.Animations. Be sure to check out the Da Vinci Eye app, as well as subscribe here for more tutorials.
You can also check out our video on how to draw an elf right here:
Hey guys! It’s Sean, an artist instructor with Da Vinci Eye. Today, we’re going to be learning how to draw a toucan.
I’ll be drawing this on my tablet for you to easily see, but feel free to use a pencil and paper. You can also follow along with the tutorial step-by-step using Da Vinci Eye for iOS and Android. The app lets you trace along with my drawing to help become more comfortable and understand exactly what I do.
So let’s get started.
Remember with every drawing to start out light. So using little pressure with a pencil, draw three circles – the head, the body, and the eye.
Now we connect everything…
And add a Y looking line to indicate the wings, since we’re looking at the back of the toucan.
After that, I’m going to go in and add some more lines for the tail feathers.
As you can see, these don’t have to be perfect.
And now we add the main event – the long beak.
I decided to give my toucan a little berry to hold onto, but you could also just have the beak closed.
Last but not least, your toucan need some environment. So let’s put it in a tree branch with a little bit of texture.
After this, I just go in for some cleanup. So I make lines darker and add some feather and beak details.
And as always remember to sign your art because you did it and you should be proud of yourself!
Now, of course, toucans are very colorful, so don’t hesitate to do some quick color and shading.
If you want to find more of my art, follow me on Instagram at @Phoenix.Animations. Be sure to check out the Da Vinci Eye app, as well as subscribe here for more tutorials.
You can also check out our video on how to draw a toucan right here:
Hey guys! It’s Sean – I’m an artist-instructor with Da Vinci Eye. Today, we’re going to learn how to draw a panda.
I’ll be drawing this on my tablet for you to easily see, but feel free to use a pencil and paper. You can also follow along with this tutorial step-by-step using Da Vinci Eye App for iOS and Android. The app lets you trace along with my drawing to help become more comfortable and understand exactly what I do.
So let’s do this! Remember to start out light, so using little pressure with the pencil, draw three trapezoids in the shape of a tree.
Now, starting with the top, I want to give my Panda a pear shaped face.
For this guy, I’m also going to add some tufts of fur on the top of the head.
Next we put in the ears and color them in real quick, a triangle nose and two small oval eyes.
Now we take the nose and extend out the mouth and muzzle.
We’re aiming to have the muzzle extend up and form the characteristic black fur around the eyes. Don’t hesitate to raise your eyes and place them in a different spot; I do this all the time.
Before we move into the second section, we need to get the Panda some bamboo to eat.
Since the panda is actively eating, we can assume the bamboo will be broken partly in half. Hence we should make one side of the bamboo more slanted than the other. I also put in some leaves to make it read better to the eye.
Now that we have the bamboo, this indicates where the paw grabbing it needs to be.
We can also extend the shoulder down to the arm and add a second line coming down from the hand. Make sure to erase any overlap while we’re here!
For the other arm, I had mine more relaxed. The biggest thing to remember here is to stay mostly within your trapezoid section. It’s okay if the arm extends a bit past like mine does, but don’t go as far as to hit the ground.
For the third section we put in two paws that are facing towards you.
That way you can put in the toes and padding underneath. Then put a slightly curved line between the two feet to connect everything.
Now here’s the fun part – coloring in and cleaning up!
As you can see, the Panda has a very distinct coat patterning…
As a final note, I always like to add in some environment. So here I get the Panda some ground to sit on and do some abstract lines to show bamboo growing behind him.
I use an oval to show the segments of the bamboo, but I’m not trying to add too much detail or pushing the pencil into hard. The background is there to enhance the character, not distract from them.
And as always, don’t forget to sign your art! You did a great job. 🙂
If you want to find more of my artwork, follow me on Instagram at @Phoenix.Animations. Be sure to check out the Da Vinci Eye app, as well as subscribe here for more tutorials.
You can also watch the tutorial on how to draw a panda below. Have a great day, and we’ll see you next time!
Hey guys! My name is Sean and I’m an artist-instructor with Da Vinci Eye. Today, we’re going to learn how to draw a turkey!
I’ll be drawing this on my tablet for you to easily see, but feel free to use a pencil and paper. You can also follow along with this tutorial step-by-step using Da Vinci Eye App for iOS and Android. The app lets you trace along with my drawing to help become more comfortable and understand exactly what I do.
Let’s start this drawing out with three circles to help us shape out the body, the tail feathers and the smaller circle head.
Now we connect the head with the body and also sketch out the giant wing.
Our Turkey is looking fantastic! So let’s take these basic shapes and give them more form.
I’m going to work on the tail feathers here. Notice that I start from the bottom and move them out like sun rays. We want them to follow the curve of the turkey’s body…
Lets add a rounded face and let’s not forget the waddle… (That’s that red thing that hangs off its face)
We can start giving our turkey some personality and life. I’m also going to go ahead and put in some environment with a shadow underneath.
To ground it a bit more, you’ll see that I’m adding in some fall pumpkins to decorate the space. Feel free to put in some leaves or even another Turkey as a friend!
Lastly, is shading and detail. I’ve added some feather patterning, and cross hatched a lot of shading.
Because the Turkey is covered in feathers, the sketch-like effect really helps build texture rather than smoothing out everything.
And as always, don’t forget to sign your art! You did an awesome job. 🙂
If you want to find more of my artwork, follow me on Instagram at @Phoenix.Animations. Be sure to check out the Da Vinci Eye app, as well as subscribe here for more tutorials.
—
You can also watch the tutorial on how to draw a turkey below. Have a great day, and we’ll see you next time!