Projector App Drawing: Mobile AR vs. Traditional Light Projection
See Da Vinci Eye in action in the video below.
If you’ve been researching ways to transfer images onto canvas or fabric, you’ve probably come across both traditional art projectors and newer projector app drawing solutions. They both do essentially the same thing, projecting a reference image onto your work surface, but the experience of using them is completely different.
I’ve worked with both physical projectors and phone based AR projection apps, and each has its place. Understanding how they differ in setup, portability, and actual results will help you choose what works best for your projects.
How Traditional Art Projectors Work
Traditional art projectors are physical devices that shine light through a transparency or reflect an image from an opaque projector onto your drawing surface. You’ve probably seen them in art classrooms or studios.

The setup requires you to either create a transparency of your image or use an opaque projector that can project from a printed photo. You’ll need to position the projector at the right distance to get your image the correct size, which usually means measuring and adjusting until it’s just right.
Once you’ve got everything positioned, you need to make sure the room is dark enough to see the projected image clearly. Any ambient light washes out the projection, so you’re often working in dim conditions.
The projected image sits on your surface, and you trace over it with pencil or paint. It’s straightforward once it’s set up, but getting there takes time.
How Projector App Drawing Works
Projector app drawing uses augmented reality instead of actual light projection. Your phone or tablet camera shows you a live view of your work surface with your reference image overlaid digitally on the screen.

With Da Vinci Eye, you select any digital image from your photo library and position it over your canvas using your phone screen. The AR anchoring locks the image in place, so even when you shift your phone to get a better angle or zoom in on details, the overlay stays aligned with your physical surface.
You’re not actually projecting light onto your work. Instead, you’re looking through your phone screen to see where to place your marks. It’s like having a transparent overlay that only you can see through your device.
This means you can work in normal lighting conditions. You don’t need a dark room, and you can see your actual paint colors and details clearly as you work.
Setup Time and Convenience
Setting up a traditional projector takes planning. You need space for the projector itself, the right distance between projector and surface, and you might need to create transparencies or prints of your reference image first.

If you’re working on something like the blacklight t-shirt shown in the video, you’d need to position your shirt vertically or find a way to project downward onto a horizontal surface. Moving the projector means recalibrating everything.
App based projection takes about 30 seconds to set up. Open the app, choose your image, position it on screen, and lock it in place with the AR anchor. I’ve used Da Vinci Eye on everything from small canvases to large wood panels, and the setup is identical every time.
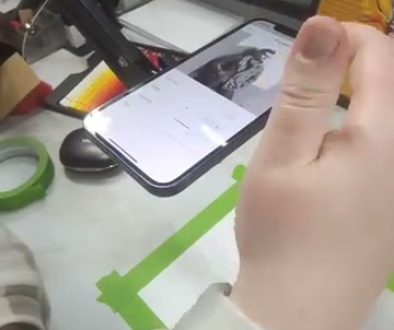
The video shows this exact workflow when adding the steampunk eye design to the t-shirt. The phone sits on a simple stand or prop, and the overlay guides the initial sketch before painting over it.
Portability and Workspace Flexibility
Traditional projectors are stationary by nature. Once you set one up, your workspace is locked in for that session. If you’re painting something like a mural or a large canvas, you either need a projector that can handle the throw distance or you work in sections.

The physical footprint matters too. You need room for the projector, clearance for the light path, and often extension cords or specific outlet placement.
Your phone goes wherever you go. I’ve used projector app drawing at my desk, outdoors at a park, at a friend’s studio, and on my kitchen table for fabric projects. The workspace is just wherever you can prop up your phone to see your work surface.
For the t-shirt project in the video, the artist set up on what looks like a standard wooden work table. No special lighting setup, no dedicated projection space, just a phone and the shirt laid flat with cardboard backing.
Working with Different Surfaces and Materials
Physical projectors work best on flat, vertical surfaces. Projecting onto fabric, curved objects, or anything textured can create distortion. The angle of projection matters, and if your surface isn’t perpendicular to the projector, your image will be skewed.
The video demonstrates painting on a black t-shirt, which would be challenging with a traditional projector. Black fabric absorbs light, making projected images very difficult to see. You’d need an extremely bright projector and a very dark room.
App based projection doesn’t rely on reflecting light off your surface. The overlay appears on your screen regardless of what color or texture you’re working on. Black fabric, dark wood, colored canvas, it all works the same way.
I’ve used Da Vinci Eye on dark surfaces where a traditional projector would be completely useless. The AR overlay shows up clearly on your phone screen no matter what’s underneath.
Image Quality and Detail Work
Traditional projectors can show a large image area at once, which is helpful for getting an overview of your composition. However, fine details can be fuzzy depending on your projector quality, and you’re always working with the resolution limits of the device.
With projector app drawing, you can zoom in infinitely on your reference image. In the video, you can see the artist working on intricate gear details and the complex eye design. The ability to zoom into specific areas while keeping the AR anchor locked means you can see tiny details clearly.
When I’m working on detailed portraits or complex patterns, I zoom in to see individual features clearly, trace or paint that section, then zoom out to check overall proportions. You can’t do that with a physical projector without physically moving the device.
The AR anchoring is what makes this work. Once you set your image position and lock it, zooming and panning doesn’t lose your place. The overlay remembers where it sits on your physical surface.
Common Mistakes When Switching to App Based Projection
The biggest mistake is not securing your work surface. Since you’re looking through your phone instead of directly at your work, bumping your canvas or fabric will throw off your reference points. Use tape, clips, or weights to keep everything stable.
Another common issue is holding your phone instead of propping it up. Your hand gets tired, the view shakes, and it’s hard to paint or draw while managing the device. A simple phone stand or even a stack of books works fine.
People also forget to adjust for their viewing angle. You’re looking at your work through the phone screen at a slight angle, so position your phone where you’d naturally look at your work. Don’t try to hold it directly overhead or at awkward angles.
Lighting matters differently than with projectors. You want good, even light on your work surface so you can see what you’re actually drawing or painting. The overlay shows up on your screen regardless, but you still need to see your actual marks clearly.
Finally, remember that the overlay is a guide, not a strict path. In the video, the artist uses Da Vinci Eye to get the initial design placement and proportions right, then goes back with black paint to refine and add details. The app helps you start accurately, but your artistic decisions make the final piece.
Start drawing with Da Vinci Eye