Da Vinci Eye

About Da Vinci Eye

Posts by Da Vinci Eye :

# Image Description A person is using the Da Vinci Eye app on their smartphone to trace or draw a portrait by positioning the phone's camera over a reference image on a green drawing board, with editing options like "Opacity," "Hide," and "More" visible on the screen.

Light Table Drawing: Why Artists Are Switching to AR

See Da Vinci Eye in action in the video below.

If you’ve ever hunched over a light table for hours, squinting at your reference photo while trying to transfer proportions to paper, you know the struggle. Light tables have been a studio staple for decades, helping artists trace and transfer images with backlit precision. But in 2026, more and more artists are swapping their bulky light table setups for something that fits in their pocket.

The shift isn’t just about convenience. It’s about how augmented reality tools let you work more naturally, see your reference and drawing surface at the same time, and skip the awkward positioning that comes with traditional light table drawing. Let’s look at why this change is happening and what it means for your workflow.

What Light Table Drawing Has Always Required

Traditional light table work means setting up a dedicated workspace. You need the table itself, which takes up desk space even when you’re not using it. You need to tape down your reference image, position your drawing paper on top, and work in a somewhat fixed position.
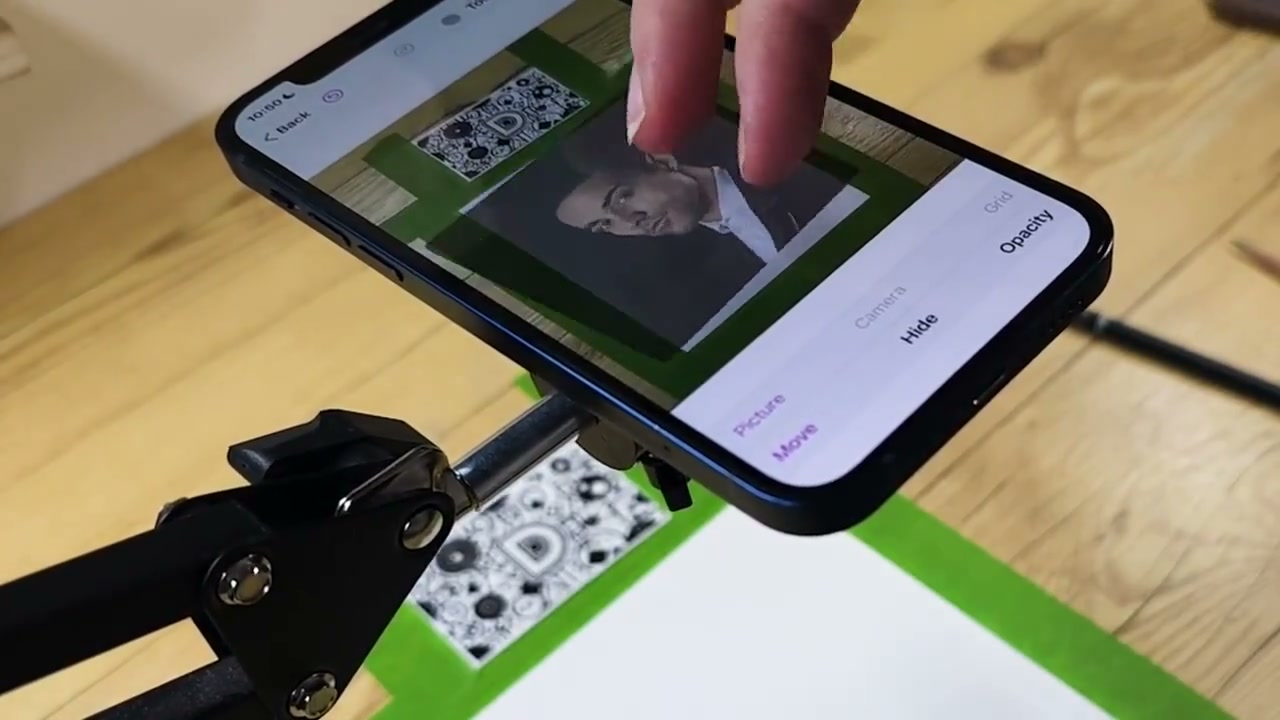
# Image Description A person is using the Da Vinci Eye app on their smartphone to trace or draw a portrait by positioning the phone's camera over a reference image on a green drawing board, with editing options like "Opacity," "Hide," and "More" visible on the screen.

The backlit surface lets you see through your paper to trace the image underneath. That’s useful for transferring sketches, studying proportions, or creating clean line art from rough drafts.

But there’s a physical limitation. You’re working flat, often leaning over the table. If you want to adjust the size of your reference, you need to print a new copy or use a photocopier. Want to flip or rotate the image? More printing, more setup.

Why AR Projection Changes the Light Table Workflow

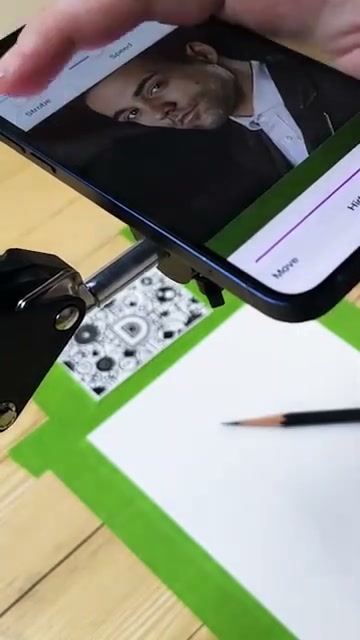
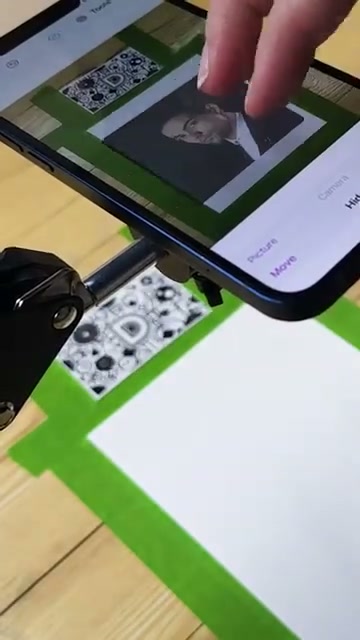
Augmented reality apps like Da Vinci Eye work differently. Instead of placing your reference image under your paper, you mount your phone above your drawing surface. The app uses your camera to overlay the reference image directly onto what you’re drawing.
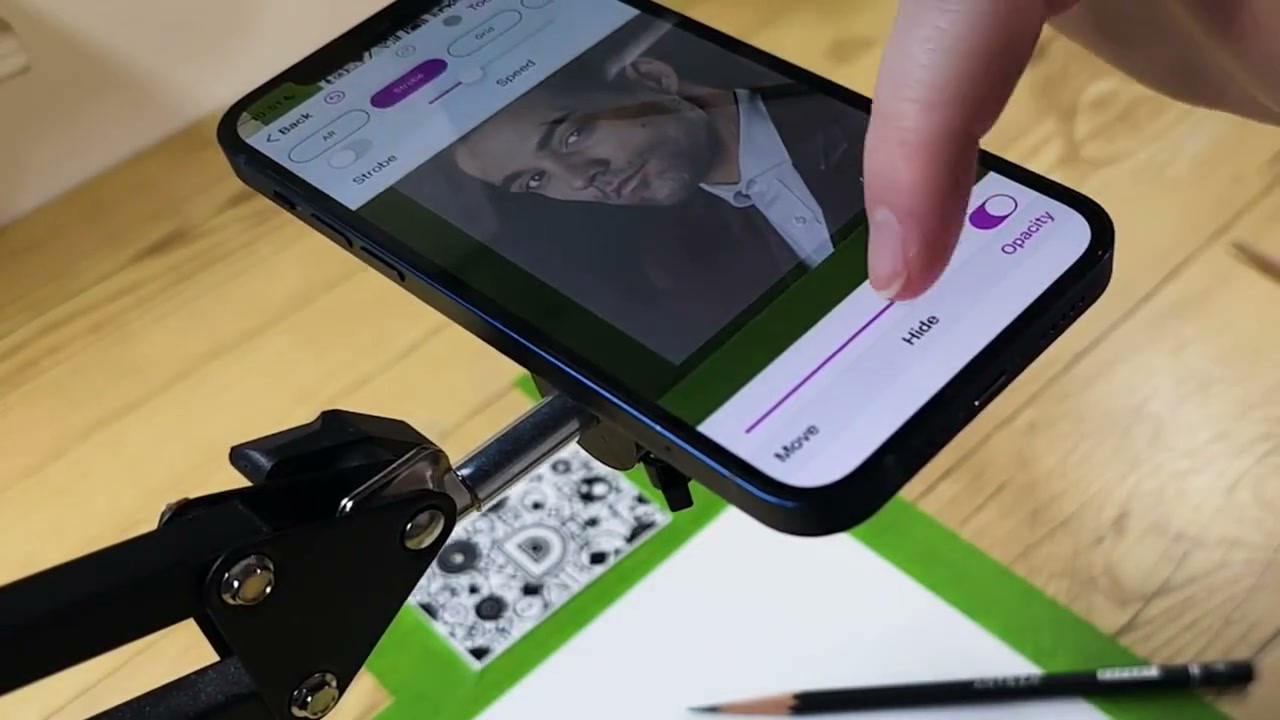
# Da Vinci Eye Drawing Tutorial In this screenshot, a person is using the Da Vinci Eye app on their smartphone to reference a portrait photo while drawing an eye, with the app displaying the image and various drawing tools/options visible on the screen.

You see both at once. Your actual paper and the projected reference exist in the same visual space. This means you’re not squinting through layers of paper or dealing with backlight glare.

The real advantage shows up when you need to adjust things. You can resize the reference with a pinch gesture, reposition it instantly, or change the opacity so you can see your own marks more clearly as you work. No reprinting, no tape, no repositioning heavy equipment.

How to Set Up Phone-Based Reference Projection

Setting this up takes about two minutes. You need a phone stand or mount that positions your phone above your drawing surface. rigid phone mounts work well because you can adjust the angle and height easily.
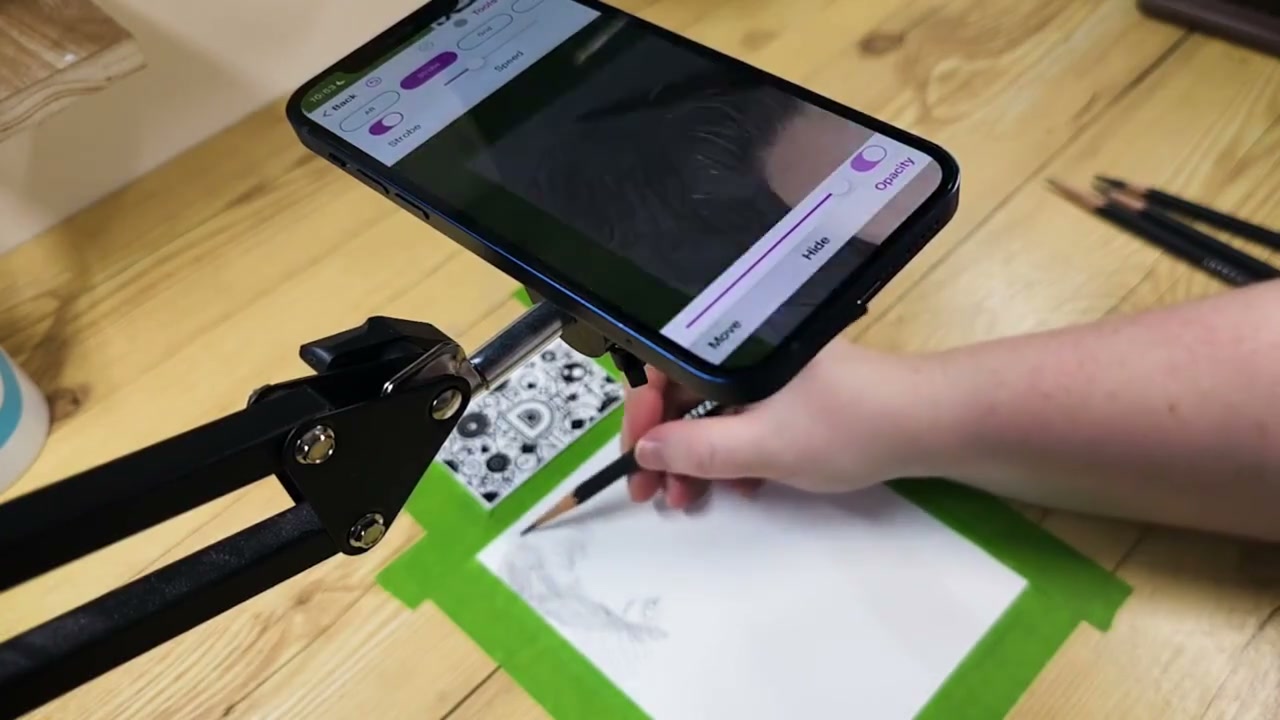
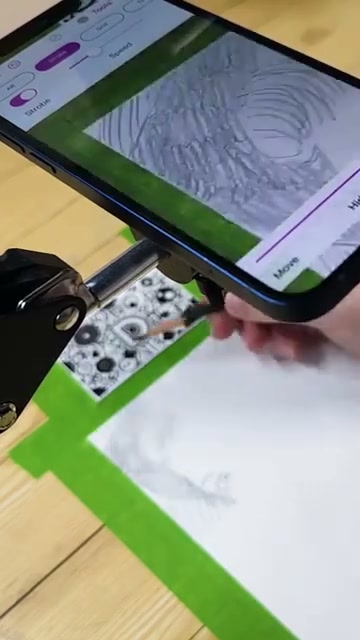
# Image Description A person is using a smartphone app connected to a drawing device to digitally capture and trace a sketch of what appears to be a face or portrait on a green drawing surface.

Open Da Vinci Eye and import your reference photo. Position your phone so the camera has a clear view of your paper. The app will overlay the reference image onto your drawing surface through the screen.

Adjust the size and position until the reference matches the dimensions you want for your drawing. You can scale it larger or smaller than the original photo, which gives you more flexibility than printing would. Once it’s positioned, you’re ready to start drawing.

The app lets you adjust opacity as you work. Start with higher opacity when you’re mapping out basic shapes and proportions. Lower the opacity as you add details, so you can see your own lines more clearly without the reference overwhelming them.

What This Means for Different Drawing Styles

Portrait artists benefit from being able to scale references to match their preferred working size. If you normally work on 11×14 paper but your reference photo is smaller, you can project it at the exact size you need without losing detail quality.
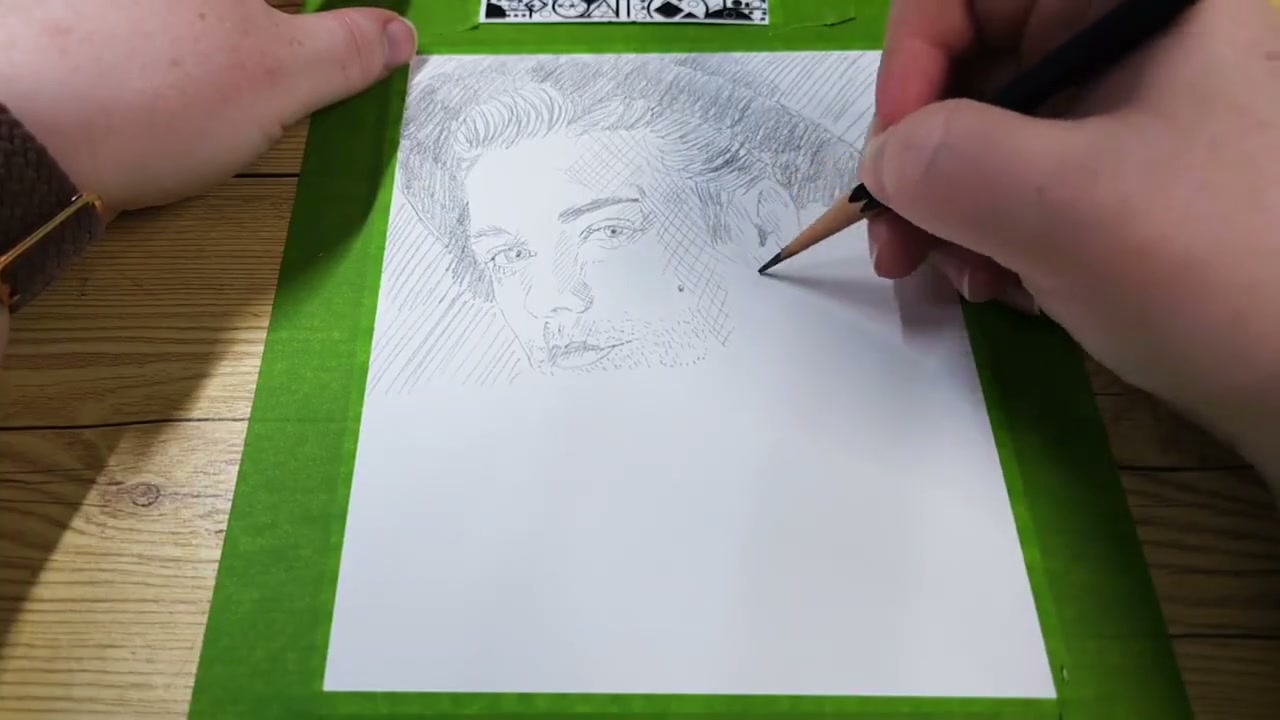
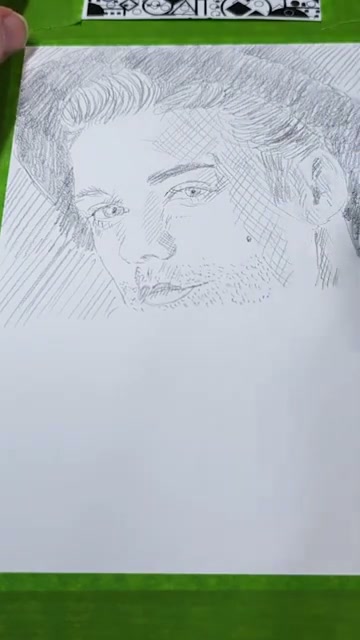
# Drawing Description A person is using a pencil to add fine cross-hatching and shading details to a portrait sketch of a man's face on white paper held within a green frame.

Detailed illustration work becomes easier when you can toggle the reference on and off. Check proportions, hide the overlay, draw from observation, then bring it back to verify accuracy. This back and forth helps you develop your eye while still having a guide available.

For studying master works or analyzing compositions, projection lets you overlay famous paintings or drawings onto your paper at any size. You can trace the gesture lines to understand how an artist constructed a pose, then practice the same pose from a different reference to apply what you learned.

The Learning Benefits Traditional Light Tables Can’t Offer

Light tables help you transfer images, but they don’t help you learn to see proportions independently. Because you’re always looking through paper at a fixed reference, you’re training yourself to copy what’s directly underneath.

AR projection tools let you practice with adjustable support. Start a drawing session with higher opacity to map out the basic structure. Then lower the opacity significantly and try to complete sections from observation. Bring it back up to check your accuracy.

This adjustable approach builds your observational skills faster. You’re not dependent on seeing the reference at full strength the entire time. You learn to trust your eye, then verify, then trust a little more.

The ability to study shapes and shadows becomes clearer when you can see your reference and your marks simultaneously. You notice where your proportions drift off, where you’re adding details that aren’t in the reference, and where your personal style naturally emerges.

Common Setup Mistakes That Mess Up Your Projection

Unstable phone mounts create frustration fast. If your phone shifts even slightly, the entire projection moves out of alignment. Invest in a mount that locks into position rather than one that drifts over time.

Poor lighting on your drawing surface makes it hard to see what you’ve actually drawn. The phone screen is bright, but your paper needs good light too. Position a desk lamp to illuminate your paper without creating glare on the phone screen.

Starting with opacity too low defeats the purpose of having a reference. If you can barely see the projection, you’ll struggle to map proportions accurately. Begin with higher opacity, then reduce it as your drawing develops and you need to see your own lines more clearly.

Working too close to your phone creates a narrow field of view. Mount your phone high enough that the camera can see your entire drawing surface. This prevents you from having to constantly adjust position as you work across different areas of your paper.

What You Actually Need to Switch From Light Table to AR

The physical requirements are minimal. A phone mount that positions your device above your work surface covers the hardware. Sturdy, rigid phone stands work best — avoid rigid phone or flexible stands, which wobble and shift mid-session.

Da Vinci Eye handles the software side. The app creates the overlay effect, lets you adjust size and opacity, and keeps the reference stable as you draw. You can work with photos from your camera roll or take new reference photos directly in the app.

Your existing drawing supplies stay the same. Pencils, paper, erasers, whatever medium you normally use. The AR projection doesn’t require special materials or surfaces. Draw on sketch paper, Bristol board, toned paper, whatever you prefer.

The workspace flexibility is where this setup really differs from light tables. You can work at your desk, at a drafting table, even outdoors in good lighting. The setup moves with you rather than requiring a dedicated permanent spot.

Start drawing with Da Vinci Eye
⬛ Download on iOS
▶ Download on Android

# Screenshot Description The image shows a Philips product box being held and prepared to be cut down in size to make room for a smaller box, as indicated by the on-screen text instruction "Cut the big box to make space for the small box."

Drawing Projector Apps vs Physical Projectors: The 2026 Guide

See Da Vinci Eye in action in the video below.

If you’ve ever researched drawing tools, you’ve probably come across both traditional physical projectors and modern drawing projector apps. Both help you transfer images to your drawing surface, but they work in completely different ways. One uses lenses and light, the other uses your smartphone’s camera and augmented reality. The question is, which one actually works better for artists in 2026?

I’ve spent time with both approaches, and the differences are bigger than you might think. Physical projectors have been around for decades, but drawing projector apps have caught up in surprising ways. Let’s break down how each one works, what they’re good at, and which situations call for each tool.

How Physical Drawing Projectors Actually Work

A physical drawing projector takes an image (either a transparency, a photo, or sometimes a digital file) and projects it onto your drawing surface using a light source and lenses. You set up the projector above or beside your workspace, adjust the focus, and trace or reference the projected image.

# Screenshot Description The image shows a Philips product box being held and prepared to be cut down in size to make room for a smaller box, as indicated by the on-screen text instruction "Cut the big box to make space for the small box."

The setup requires space. You need room for the projector itself, clearance for the light path, and a way to keep everything stable while you work. Most artists end up dedicating a corner of their studio to the setup because moving it around gets old fast.

The projected image quality depends on your room lighting. Too much ambient light and the projection washes out. You’ll often find yourself drawing in a darker room, which can strain your eyes after a while.

Physical projectors do one thing really well, though. They can project large images with consistent brightness across the entire surface. If you’re working on a big canvas or mural, that consistency matters.

How Drawing Projector Apps Use AR Technology

Drawing projector apps like Da Vinci Eye take a completely different approach. Instead of projecting light onto your surface, they use augmented reality to overlay your reference image directly through your phone’s camera.

I don't see a Da Vinci Eye drawing tutorial video in this image. Instead, the image shows a person holding a black computer component (appears to be a graphics card or similar hardware) next to a window, with a patterned fabric visible in the background. This appears to be a photograph of someone with computer hardware, not a drawing tutorial video.

You mount your phone above your drawing surface (using a stand, tripod, or even a DIY setup), open the app, and look at your screen. What you see is a live camera feed of your paper with your reference image overlaid on top. You can see both your drawing surface and the reference at the same time.

The biggest difference is portability. Your entire setup fits in your pocket. I’ve used Da Vinci Eye on trains, in coffee shops, and in different rooms of my house without any hassle. There’s no projector to haul around and no special lighting requirements.

The overlay stays aligned with your paper even if you move slightly. Modern AR tracking is surprisingly stable, and you can adjust opacity, size, and position with simple gestures. It’s responsive in a way physical projectors just can’t match.

Accuracy Comparison: Projection vs AR Overlay

Here’s where things get interesting. Physical projectors can technically project very sharp images, but that sharpness depends on your focus adjustment, the distance from projector to surface, and keeping everything perfectly still.

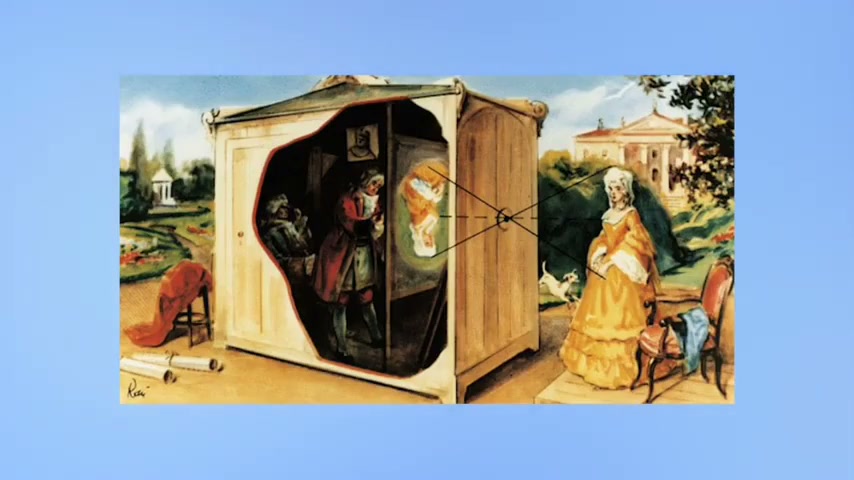
# Description This historical illustration depicts an early camera obscura device, showing how artists used this optical contraption to trace projected images onto a surface, demonstrating a fundamental technique for achieving realistic perspective and proportion in drawing and painting during the Renaissance period.

Any vibration, like your hand bumping the table, can shift a physical projection. If you’re tracing and you accidentally nudge your setup, you’ll notice the misalignment immediately. Some artists tape down reference points, but it’s still a factor you have to manage.

Drawing projector apps handle accuracy differently. The AR overlay doesn’t physically touch your paper, so there’s nothing to bump or shift. The accuracy comes from how well the app tracks your surface and how clearly your phone’s camera can see your workspace.

In my experience, both methods get you accurate proportions. The real difference is in how forgiving they are. Apps let you check your work by toggling the overlay on and off instantly. With a physical projector, you’re either looking at the projection or you’re not,there’s no quick comparison mode.

Da Vinci Eye includes features like the Strobe tool that flashes the reference on and off, letting you compare your drawing to the reference in real time. That kind of instant feedback just isn’t possible with traditional projection.

Portability and Setup Time Face Off

Setting up a physical projector takes time. You need to position the projector, load your image, adjust the focus, dim the lights, and test the alignment. Plan on 10 to 15 minutes before you actually start drawing.

# Da Vinci Eye Drawing Tutorial In this screenshot, a person wearing a pink sleeve is using a smartphone to reference an image while drawing an eye on white paper placed on a wooden desk.

Packing it up is just as involved. If you’re someone who draws in different locations or likes to switch between projects quickly, that setup time adds up over weeks and months.

Drawing projector apps win on setup speed. Open the app, position your phone, and you’re ready to draw in under a minute. I’ve gone from idea to first pencil stroke faster with an app than I ever did with physical equipment.

The portability factor is huge if you travel. A phone mount weighs next to nothing and fits in any bag. Try bringing a traditional projector on a trip and you’ll immediately understand why artists are switching to digital solutions.

That said, if you have a permanent studio space and you draw at the same desk every day, setup time becomes less important. A physical projector that’s always ready to go can work just fine in that scenario.

Working With Different Image Sources

Physical projectors typically need your image in a specific format. Older models use transparencies, which means you’re printing or converting your reference images before you can use them. Newer digital projectors can work from USB drives or SD cards, but you’re still transferring files around.

Want to use a photo you just took on your phone? With a physical projector, you’ll need to get that image onto whatever media your projector accepts. It’s doable, but it’s extra steps between inspiration and actual drawing.

Apps have a big advantage here. Any image on your phone is immediately available. Photos from your camera roll, downloaded references, screenshots, even images from websites can be loaded in seconds. The friction between finding a reference and using it basically disappears.

Da Vinci Eye lets you import from multiple sources, adjust the cropping, and even work with images at different sizes without any extra equipment. That flexibility changes how you approach reference gathering.

The Camera Obscura Connection: Drawing Projection Through History

Before we had either modern projectors or smartphone apps, artists built camera obscuras. These were boxes or even entire rooms with a small hole that projected an inverted image of the outside world onto an interior surface.

The camera obscura worked on pure optics. Light traveling through a tiny aperture creates an upside-down image on the opposite wall. Artists would trace these projected images to capture accurate perspectives and proportions, especially for landscapes.

Building one yourself shows you the fundamentals of how projection works. You need a light-tight box, a pinhole or lens, and a surface to receive the image. Getting the image clear enough to trace takes experimentation with hole size, box dimensions, and distance adjustments.

The tracing itself is tricky with a basic camera obscura. You need a rigid surface behind your paper (plexiglass works well), and you have to work in near-total darkness to see the projected image clearly. It’s a hands-on history lesson, but not exactly practical for regular drawing sessions.

Modern drawing projectors are essentially refined camera obscuras with better optics and light sources. Drawing projector apps take the same concept but flip it, instead of projecting the world onto paper, they project a digital reference through AR onto your live workspace.

Common Mistakes When Choosing Between Projectors and Apps

The biggest mistake is buying a physical projector without testing your workspace first. If you don’t have room for the projector-to-surface distance the device needs, or if your space has too much ambient light, you’ll be frustrated before you even start drawing.

Another common error is expecting either tool to do the drawing for you. Both projectors and apps help with proportions and initial layout, but they don’t replace your observation skills or hand control. You still need to understand values, edges, and how to translate what you see into marks on paper.

Some artists dismiss drawing projector apps because they assume phone cameras aren’t accurate enough. Modern smartphone cameras are surprisingly good, and AR tracking has improved dramatically. Give the technology a fair shot before deciding it won’t work for you.

On the flip side, don’t assume physical projectors are automatically more “professional.” The tool that helps you learn and create better work is the right tool, regardless of whether it’s a hundred-year-old technique or a modern app.

Forgetting to secure your phone properly is a mistake I see beginners make with apps. A wobbly phone mount creates a wobbly overlay. Invest in a stable stand or mount, and your experience improves immediately.

Which Drawing Projector Approach Fits Your Drawing Style

If you work large, say canvas sizes over 24 by 36 inches, a physical projector might serve you better. Traditional projectors can cover bigger areas with consistent image quality, and you won’t be limited by your phone’s camera field of view.

If you move around, work in different locations, or like switching between multiple references quickly, a drawing projector app makes more sense. The portability and instant image switching are hard to beat.

For artists just starting out, apps have a lower barrier to entry. You already have a phone, and phone mounts are inexpensive. You can start practicing with projected references immediately without buying specialized equipment.

Experienced artists who already have dedicated studio spaces might appreciate physical projectors for their simplicity. There’s something to be said for a tool that does one thing consistently without needing software updates or battery charging.

Personally, I keep both options available. For detailed portrait work at my desk, I’ll use Da Vinci Eye because I can adjust opacity, use the Strobe feature to compare values, and work in normal lighting. For larger pieces where I need wall-sized projection, a traditional projector makes sense.

The real answer is that these aren’t competing tools, they’re complementary ones. Understanding what each approach does well helps you pick the right one for each specific project. Your drawing goals matter more than which technology sounds more impressive.

Start drawing with Da Vinci Eye
⬛ Download on iOS
▶ Download on Android

dve-frame-aCtKHfNLbVK0wuRgxqZ7-0

Da Vinci Eye: How AR Projection Changed Drawing in 2026

See Da Vinci Eye in action in the video below.

If you’ve ever tried to trace a reference photo using a lightbox or grid method, you know the frustration. The image shifts, your paper moves, and suddenly nothing lines up anymore. By 2026, augmented reality has completely changed how artists approach reference work, and Da Vinci Eye sits right at the center of that shift.

This app uses your phone’s camera to overlay reference images directly onto your drawing surface. You see both your paper and your reference at the same time, perfectly aligned, no matter how you move or adjust your setup. It’s become the go-to tool for artists who want accurate proportions without the hassle of traditional projection methods.

How AR Projection Actually Works in Da Vinci Eye

The core technology is simpler than it sounds. You load a reference photo into the app, point your phone’s camera at your drawing surface, and the app overlays the image onto what you see through your screen.

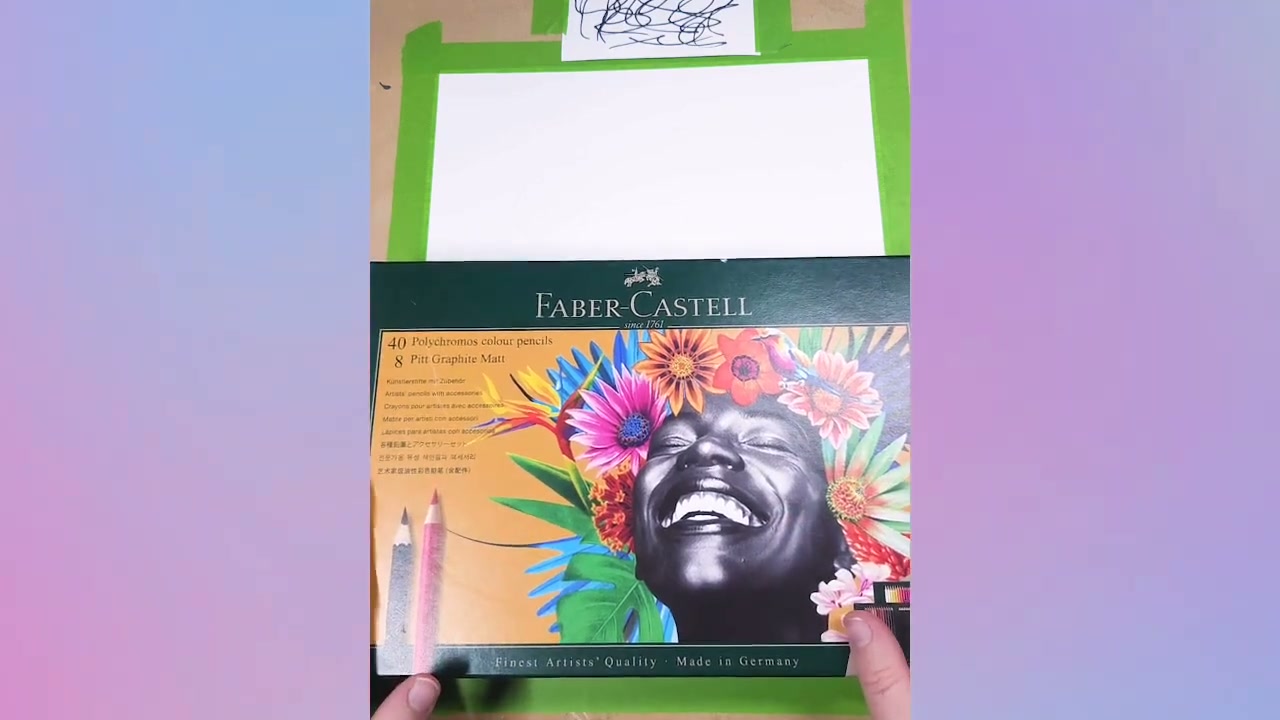
# Image Description The screenshot shows a Faber-Castell Polychromos colored pencil set (40 pencils + 8 Pitt Graphite Matt) being held up and displayed, featuring artwork of a joyful person surrounded by colorful flowers on the packaging.

What makes this different from older methods is the AR tracking. The app uses an anchor point system that adjusts the overlay in real time. If your paper isn’t perfectly flat or your phone angle shifts slightly, the image compensates automatically.

This means you can work on textured surfaces, canvases, or even slightly curved paper without worrying about distortion. The reference stays locked to your drawing surface through software, not through mechanical positioning like a traditional projector would require.

One artist in the tutorial video even streams the app view to a TV screen. This lets her see a much larger workspace while still using her phone to track the drawing surface. It’s a setup that wouldn’t be possible with lightboxes or grid transfers.

Why Artists Switched From Lightboxes and Grids to AR

Lightboxes only work with thin paper and require you to work in specific positions. If you’re drawing on canvas, wood, or thick watercolor paper, you’re out of luck. Grids take forever to set up and measure, and one small miscalculation throws off your entire proportion structure.

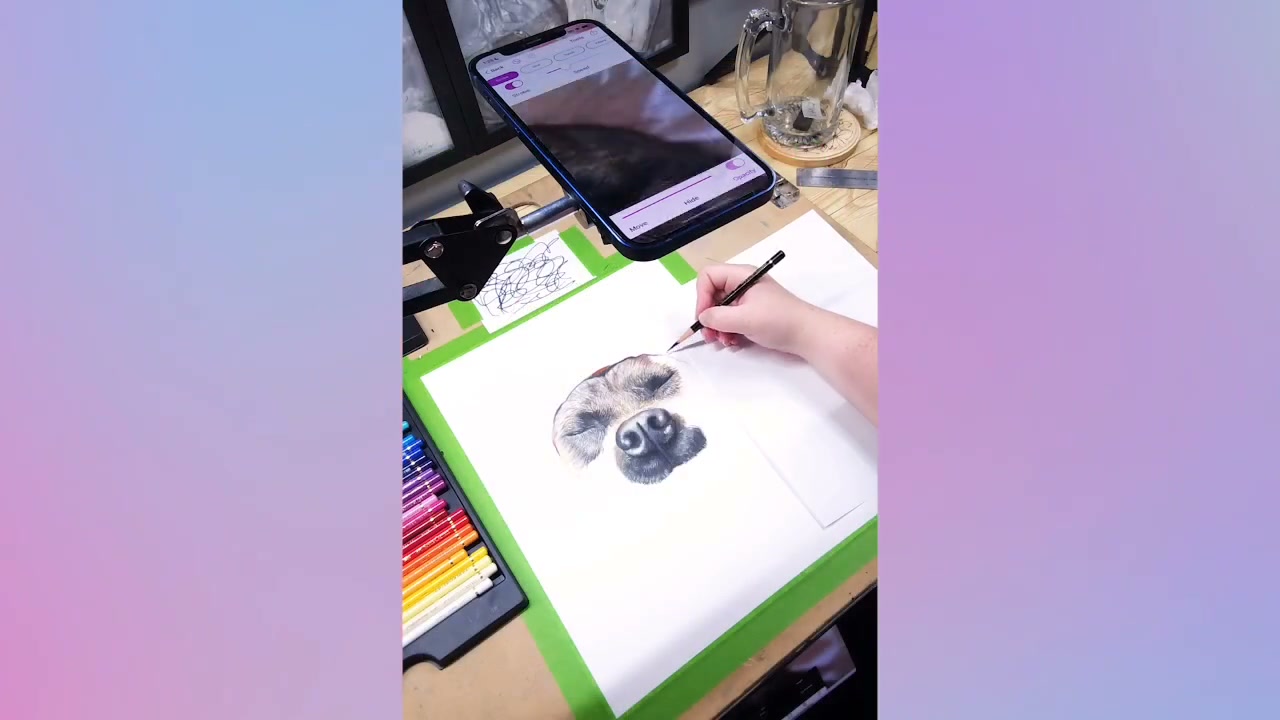
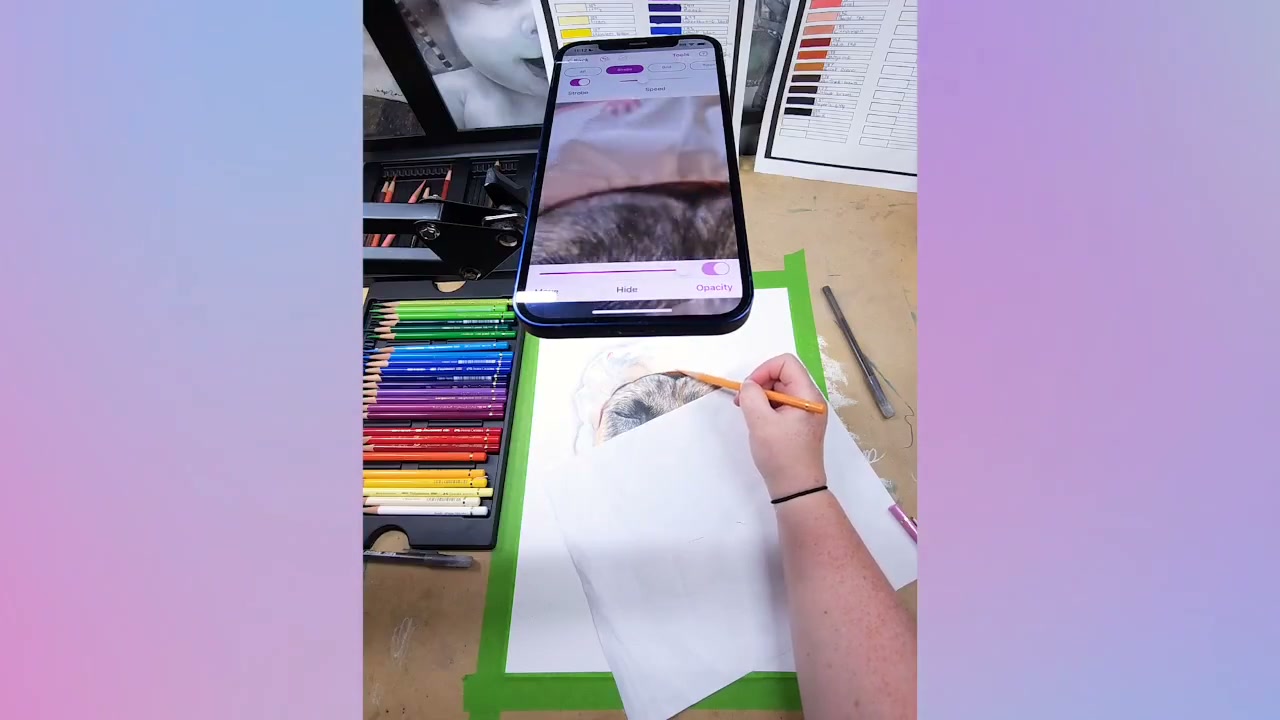
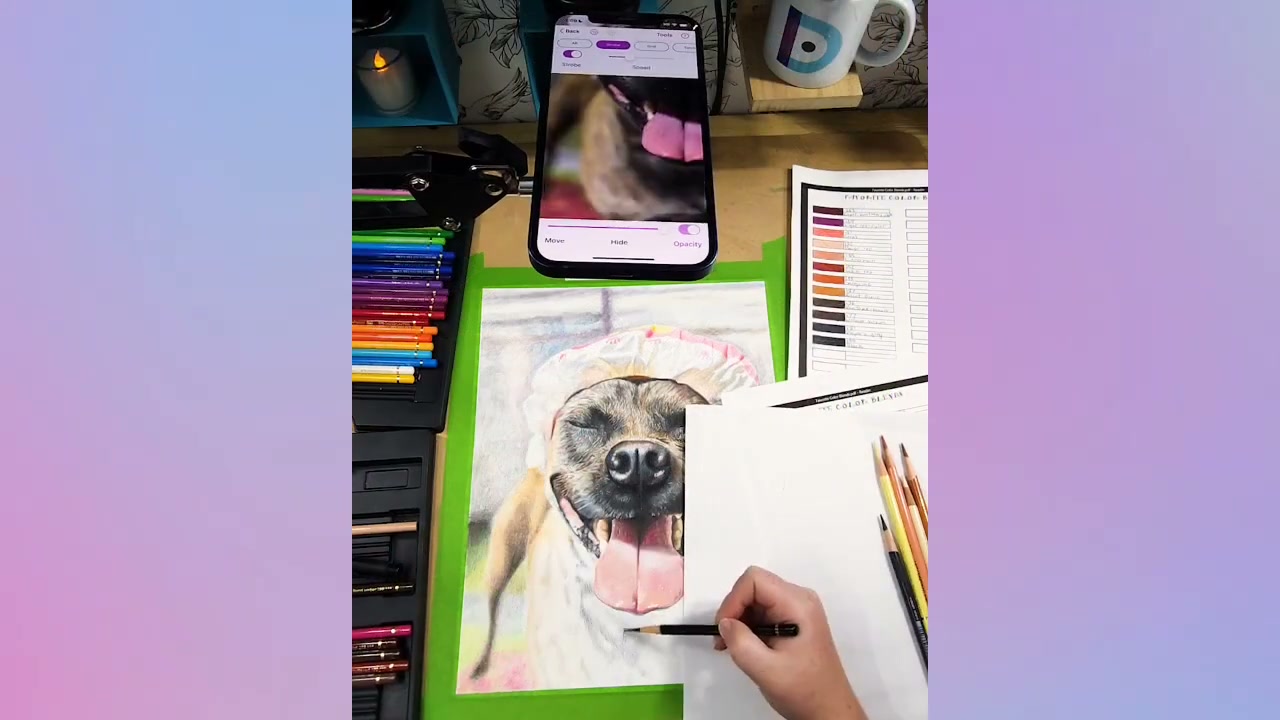
# Da Vinci Eye Drawing Tutorial In this screenshot, a person is hand-drawing a detailed portrait of a dog's eyes and nose on paper using a stylus or pen, while referencing the same image displayed on a smartphone screen positioned above their work.

Da Vinci Eye removes those limitations completely. You can trace onto any surface, at any angle, without tape or clips or careful positioning. The app handles all the alignment work that used to eat up your setup time.

The AR anchor system is the real breakthrough here. When you accidentally bump your phone or shift your paper (and you will), the overlay doesn’t lose its position. Traditional methods would force you to start over or spend minutes realigning everything.

Artists who work on murals or large canvases have especially benefited from this. You can scale your reference to fit huge surfaces and walk around while working, something that’s impossible with stationary projection equipment.

Features That Go Beyond Simple Tracing

The breakdown mode creates step-by-step stencils based on color values in your reference. This is incredibly helpful for watercolor and graphite work, where you build up layers gradually from light to dark.

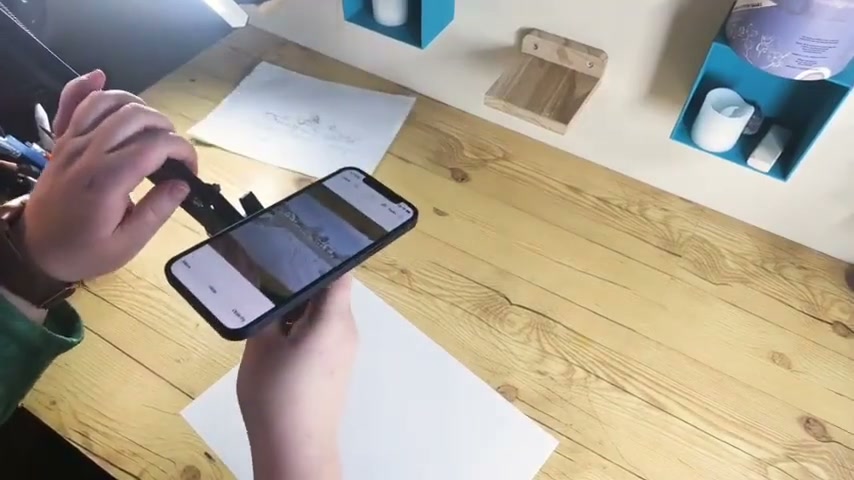
# Drawing Tutorial in Progress A person is sketching an eye in pencil on white paper while referencing a landscape image displayed on their smartphone, surrounded by colored pencils and design materials for the Da Vinci Eye drawing tutorial.

Instead of trying to figure out which areas to start with, the app separates your reference into value stages. You work through each stencil layer, which teaches you to see value relationships more clearly over time.

The strobe tool flashes between your drawing and the reference image. This makes it easy to spot proportion errors or areas where your values don’t match. It’s like having a second pair of eyes that can instantly compare your work to the original.

There’s also a built-in recording feature that captures time-lapse videos of your process. You don’t need separate camera equipment or editing software to create content for social media. The app handles it while you draw.

What AR Can’t Do For You (And Why That Matters)

The app gives you accurate proportions and placement, but it doesn’t handle your materials for you. You still need to understand how graphite blends, how watercolor behaves on wet paper, or how to layer colored pencils for smooth transitions.

# Da Vinci Eye Drawing Tutorial A person is painting or drawing a dog's nose and mouth area with a brush as part of a realistic portrait painting tutorial, using reference materials and color guides visible on their workspace.

Those technical skills are what make a drawing look alive. Da Vinci Eye gets your foundation right so you can focus on the rendering work that actually develops your artistic voice.

In the tutorial video, the artist works through a detailed dog portrait. The app helps her place the eyes, nose, and mouth correctly, but the fur texture, the shine in the eyes, and the soft blending around the muzzle all come from her understanding of how to use her pencils.

This is why the tool works well for both beginners and experienced artists. Beginners get accurate structure to build on while they learn technique. Experienced artists save time on layout so they can spend more energy on the creative decisions that define their style.

Setting Up Your First AR Drawing Session

Start by choosing a reference photo with clear lighting and good contrast. The app works with any image, but high-quality references give you better results to learn from.

Position your phone so the camera has a clear view of your entire drawing surface. You don’t need a tripod, but some kind of stable holder helps. A stack of books or a propped-up case works fine.

Use the anchor point to lock the overlay to your paper. This is the step that makes everything else work smoothly. Take a few seconds to set it properly, and you won’t have to readjust later.

Adjust the opacity of the overlay to match your comfort level. If you’re just sketching proportions, you might want a lighter overlay. For detailed tracing, increase the opacity so you can see the reference more clearly against your paper.

Common Mistakes When Starting With AR Drawing

The biggest mistake is relying on the overlay so heavily that you never look at your actual paper. The point is to use the reference as a guide, not to ignore what’s happening with your materials.

Check your work frequently by turning off the overlay. This helps you see what your drawing actually looks like without the reference covering it. You’ll catch value issues and blending problems much earlier this way.

Another common issue is working too small. AR projection works at any scale, so there’s no reason to cramp your drawing into a tiny space. Give yourself room to work comfortably and add detail.

Don’t skip the anchor point setup. It feels like a small step, but it’s what keeps your overlay stable when you move around. Taking 30 seconds to set it properly saves you from constant readjustment later.

Finally, remember that the app shows you where things go, but you still control how they look. Use the reference for placement and proportion, then make artistic choices about style, detail level, and finishing techniques that match your creative goals.

Start drawing with Da Vinci Eye
⬛ Download on iOS
▶ Download on Android

dve-frame-tf2yWUAI2TmXRg639TVJ-0

Camera Lucida: The Renaissance Tool Now in Your Smartphone

See Da Vinci Eye in action in the video below.

You’ve probably seen those old engravings of artists hunched over strange contraptions, one eye closed, carefully copying what they see through a prism or mirror. That’s a camera lucida, and it’s been helping artists nail proportions and perspective since the early 1800s. What you might not know is that the same principle is now sitting in your pocket, ready to use whenever inspiration strikes.

The camera lucida isn’t some dusty relic. It’s a drawing aid that worked then and still works now, just in a different form. Let’s trace the path from Renaissance optical devices to the augmented reality tools you can use today.

What Is a Camera Lucida and How Did It Work?

The camera lucida was patented in 1807 by William Hyde Wollaston, though artists had been experimenting with similar optical tricks for centuries. It’s essentially a prism mounted on an adjustable arm that you position over your drawing surface.

Camera Lucida: The Renaissance Tool Now in Your Smartphone

When you look down through the prism at just the right angle, you see two things at once. Your eye catches the reflection of your subject (a landscape, a portrait, whatever you’re drawing) and simultaneously sees your paper and pencil directly below. The optical illusion makes it look like the scene is projected right onto your paper.

This wasn’t photography, it was pure optics. You still had to draw every line yourself, but the camera lucida let you check your proportions constantly. If the curve of a cheekbone in the reflection didn’t match the curve you’d drawn, you knew immediately where to adjust.

Artists loved it because it didn’t replace skill. It just removed some of the guesswork from measuring and placement, letting them focus on the actual drawing.

The Optical Drawing Tools That Came Before

The camera lucida didn’t appear out of nowhere. Artists had been finding ways to see and transfer images accurately for hundreds of years before Wollaston’s patent.

Camera Lucida: The Renaissance Tool Now in Your Smartphone

The camera obscura is probably the most famous ancestor. It’s a darkened room or box with a tiny hole that projects an upside-down image of whatever’s outside onto the opposite wall. Artists could trace this projection or use it to study how light and shadow actually behave. Leonardo da Vinci described it in his notebooks, and painters from Vermeer to Canaletto likely used some version of it.

Then there were grid methods, where you’d draw a grid over your reference and a matching grid on your canvas. You’d copy each square one at a time, breaking down a complex scene into manageable chunks. Albrecht Dürer famously illustrated this technique in his woodcuts from the 1500s.

These weren’t shortcuts around learning to draw. They were tools that let artists study their subjects more carefully, understand proportions more accurately, and work more efficiently. The same reason you’d use them then is the same reason digital tools make sense now.

Why Artists Actually Used These Drawing Aids

Here’s the thing that gets lost in modern conversations about drawing tools. The old masters weren’t worried about whether using a camera lucida made them “real” artists or not. They had work to do.

Camera Lucida: The Renaissance Tool Now in Your Smartphone

Portrait artists needed accurate likenesses. Their clients expected to be recognizable, and a camera lucida helped ensure the proportions of a face were correct before investing hours in rendering. Landscape painters wanted to capture the exact relationship between buildings and horizon lines. Botanical illustrators needed precision that couldn’t be achieved by eyeballing alone.

Using optical aids also sped up the initial sketching phase. Instead of spending an hour measuring and remeasuring with a pencil held at arm’s length, you could establish your composition quickly and move on to the parts that really mattered. The rendering, the values, the brushwork, the artistic decisions that made the piece yours.

Training your eye was another benefit. When you can see your reference and your drawing simultaneously, you start to notice things. You see how you consistently make heads too large or how you compress vertical distances. Over time, these tools taught artists to see more accurately even when they weren’t using them.

From Glass Prisms to Phone Screens

The jump from a camera lucida to a smartphone app might seem huge, but the principle is identical. You’re overlaying a reference image onto your view of your drawing surface so you can see both at once.

Camera Lucida: The Renaissance Tool Now in Your Smartphone

Da Vinci Eye’s Classic Mode does exactly what Wollaston’s device did, just without the finicky prism alignment. You suspend your phone above your paper using a stand, a glass, or really anything stable. The app uses your phone’s camera to show you your drawing surface and layers your reference image on top of it with adjustable transparency.

You can move the reference around with one finger, resize and rotate it with two. Need to zoom in to see a tricky detail? Pinch to zoom the camera view while the image stays locked in position. Want to check your work without the overlay? Drag the opacity slider until the reference fades out completely.

It’s the same workflow artists used 200 years ago, minus the neck strain from squinting through a prism. You’re still making every mark yourself. You’re still deciding values, textures, and style. You’re just checking your proportions against a reference that sits right where you can see it.

How Modern AR Tracing Fits Into Your Practice

The question isn’t really whether tools like this are valid. History settled that centuries ago. The question is how to use them in a way that actually develops your skills.

Start by using the overlay to understand proportions. Before you make a single mark, spend time just looking. Notice how far the eyes actually are from the bottom of the chin. See how the shoulders are wider than you’d think, or narrower. Let the reference teach your eye what reality looks like instead of what you assume it looks like.

Then use the overlay to establish your framework. Get the big shapes and key landmarks down. The tilt of the head, the horizon line, the basic gesture of a pose. Once your foundation is solid, reduce the opacity or turn it off entirely and start making the drawing your own.

This is where your style comes in. The overlay shows you structure, but it doesn’t tell you how to render an edge or what medium to use or whether to exaggerate certain features for effect. Those choices are entirely yours, and they’re what make your work interesting.

As you practice, you’ll find yourself needing the reference less. Your hand starts to remember the relationships between features. Your eye gets better at judging angles and distances. The tool becomes training wheels you eventually don’t need as often, though there’s no shame in using them whenever they’re helpful.

Common Mistakes When Using Drawing Overlays

The biggest mistake is treating the overlay like a coloring book. If you’re just mindlessly tracing every line without thinking about what you’re drawing, you’re not learning anything. You’re just moving a pencil around.

Instead, engage with what you’re seeing. Ask yourself why a line curves the way it does. Notice how the shadow edge relates to the light source. Think about the three-dimensional form you’re representing, not just the two-dimensional lines.

Another common issue is keeping the opacity too high for too long. If your reference image is completely opaque, you can’t see your own marks well enough to evaluate them. Start around 50% transparency and adjust from there. You want to see the reference clearly enough to guide you, but not so strongly that it overwhelms your actual drawing.

Don’t forget to check your work without the overlay. Every few minutes, turn the reference off or slide it out of the way. Your drawing needs to work on its own terms, not just when it’s perfectly aligned with a photo. If something looks wrong when the overlay is off, that’s what you need to fix.

Finally, remember that the overlay is showing you one specific view from one specific angle. If you’re drawing from life or working on something creative, you might want to deviate from that exact view. Use the reference as information, not as law. Your artistic judgment should always have the final say.

Start drawing with Da Vinci Eye
⬛ Download on iOS
▶ Download on Android