The Best Drawing Apps for Photorealistic Portraits in 2026
See Da Vinci Eye in action in the video below.
If you are looking for drawing apps that can help with photorealistic portraits in 2026, the biggest thing to look for is not a giant feature list. It is whether the app actually helps you get proportions, placement, and reference details onto paper while you are drawing.
Portraits are unforgiving. If an eye is a little too high, a mouth is slightly too wide, or the jaw angle drifts, the likeness can disappear fast. A good drawing app should make those early structure decisions easier without taking the art out of your hands.
What matters in drawing apps for realistic portraits
The best drawing apps for portrait work help you solve the hardest part first: accuracy. Before shading, texture, color, or expression can work, the main shapes need to be in the right places.

That means the app should let you work from a reference image in a way that is clear and practical. You should be able to line up the portrait, check proportions, adjust opacity, and keep your hand moving on the paper instead of constantly measuring and correcting.
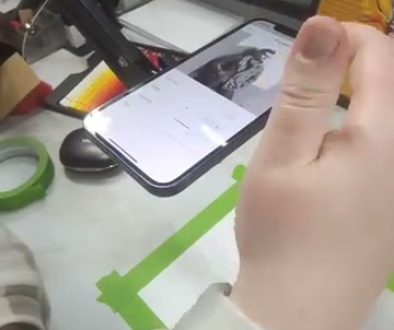
Da Vinci Eye is useful here because it turns your phone camera into a live drawing reference. You can place your reference over your paper, draw the main structure, then keep checking the image as the portrait develops.
Why AR helps with photorealistic portraits
Photorealism depends on small relationships. The distance between the eyes, the curve from the nose to the cheek, and the placement of shadows all need to work together. AR drawing tools make those relationships easier to see because the reference and the paper live in the same view.

Instead of looking up at a reference, guessing a measurement, then looking down to draw, you can compare the reference directly against your marks. That makes the process feel less like copying and more like checking your work while you build it.
This is especially helpful for beginners and intermediate artists. You still need to make decisions about pressure, line quality, value, and texture, but the app helps remove the proportion mistakes that usually derail the drawing early.
How the drawing process works in Da Vinci Eye
A typical setup starts with your phone above the paper. You load the portrait reference, position it over your drawing surface, and adjust the opacity so you can see both the reference and your own pencil marks.

From there, you can sketch the big shapes first. Place the eyes, nose, mouth, hairline, shoulders, and major shadow shapes before worrying about detail. This gives the portrait a solid map.
As you work, you can lower the opacity and rely more on your own drawing. The goal is not to trace every tiny detail. The goal is to use the app as a guide while you practice seeing shapes and proportions more accurately.
Look for images that show real progress
For an article about photorealistic portrait drawing, the images matter. Finished artwork can be inspiring, but process images are much more useful. You want to see the reference, the paper, the hand, and the drawing developing over time.

That kind of image shows how the app fits into an actual workflow. It makes the technique easier to understand because you can see where the phone is, how the artist is holding the pencil or brush, and how much of the drawing is already on the page.
Good process screenshots also make it clear that the artist is still doing the work. The app helps with alignment and reference, but the drawing is built by hand through observation, pencil control, and gradual refinement.
Sketching first, then building detail
For portrait work, start lighter than you think you need to. Use the overlay to place the large shapes with soft pencil marks. These early marks are scaffolding, not final lines.
Once the structure feels right, begin adding the features. Work slowly around the eyes, nose, and mouth. These areas carry most of the likeness, so it is worth checking them often against the reference.
After the main features are placed, move into value. Build shadows gradually and compare the dark areas to the reference. Photorealistic portraits usually succeed because the values are accurate, not because every line is outlined perfectly.
Using drawing apps without becoming dependent on them
The healthiest way to use AR drawing apps is as a training tool. Let the app help you see what you might miss, then pay attention to why the correct placement works.
Notice how wide the head is compared to the eyes. Notice where the mouth sits below the nose. Notice how shadow shapes wrap around the face. These observations carry over into your drawing even when you are not using the app.
You can also use a simple exercise: draw a portrait with the overlay, then try a second sketch from the same reference without it. Most artists notice that their second attempt is more accurate because the guided version trained their eye first.
Common mistakes when choosing drawing apps
One mistake is choosing an app only because it has lots of tools. For portrait drawing, fewer practical tools often beat a crowded interface. You need reference alignment, opacity control, stable viewing, and a workflow that keeps your focus on the paper.
Another mistake is using the overlay too heavily for too long. If the reference stays at full opacity the whole time, it becomes harder to judge your own marks. Lower the opacity as soon as the main structure is down.
Finally, do not judge the process only by the finished image. The best drawing apps are the ones that make the middle of the drawing easier: the measuring, checking, adjusting, and correcting that happen before the final polish.
Start drawing with Da Vinci Eye