AR Drawing to Sketch Paint: The New Renaissance in Digital Art Tools
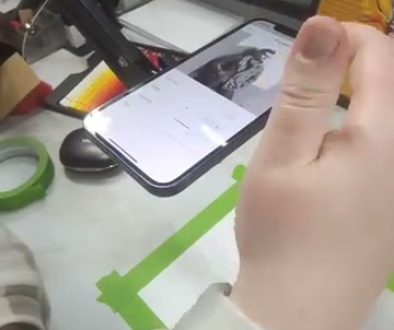
See Da Vinci Eye in action in the video below.
You’ve probably seen those moments when an artist lines up their phone just right and starts sketching something that looks impossibly accurate. That’s AR drawing in action, and it’s changing how we think about the relationship between what we see and what we create on paper.
AR drawing to sketch and paint tools use augmented reality to bridge the gap between your reference image and your drawing surface. Instead of glancing back and forth between a photo on your screen and your paper, you see both at once through your phone’s camera. It’s like having tracing paper for any image you want to work from.
How AR Drawing Changes Your Relationship with Reference Images
Traditional reference methods always mean divided attention. You look at a photo, memorize a shape or measurement, then look down at your paper and try to replicate it. Then you check back to see if you got it right.
AR drawing tools like Da Vinci Eye eliminate that back and forth. When you position your phone over your drawing surface, you see your reference image overlaid directly onto your paper through the camera. Your hand, your pencil, and the reference image all exist in the same visual space.
This changes everything about how you learn proportions. Instead of trying to translate measurements in your head, you’re seeing the actual relationships between elements as you draw them. You notice where the corner of an eye lines up with the edge of a nose, or how the curve of a shoulder relates to the position of an elbow.
You’re training your eye to see these relationships naturally. The more you work this way, the better you get at spotting proportions even when you’re not using the tool.
Setting Up Your AR Drawing Space
Getting started with AR drawing to sketch and paint requires a bit of setup, but once you understand the basics, it becomes second nature.
First, you need stable positioning for your phone. Your hands need to be free to draw, so you’ll want a phone stand, tripod, or mount that holds your device above your drawing surface. The angle matters. You want your phone camera pointing straight down at your paper for the most accurate overlay.
Lighting makes a huge difference. You need enough light to see your paper clearly, but not so much glare that it washes out your phone screen or makes it hard to see the overlay. Natural indirect light works great, or a desk lamp positioned to the side rather than directly overhead.
In Da Vinci Eye, you’ll load your reference image and adjust its size and position to match your paper. You can tap and drag to move it around, pinch to resize it, and rotate it until it fits exactly where you want to draw. The app lets you adjust the opacity too, so you can see your own marks as you work.
Drawing Techniques That Work Better with AR Overlay
AR drawing to sketch and paint tools really shine when you’re learning to handle difficult subjects. Portraits are the perfect example because proportions matter so much and small errors are really obvious.
Start by mapping out the basic shapes and relationships. With the AR overlay, you can see exactly where to place the eyes relative to the hairline, or how wide the nose should be compared to the distance between the eyes. These foundational proportions are what make or break a portrait.
Once your structure is solid, you can reduce the opacity of the overlay and focus on details. You’re not tracing every eyelash or skin texture. You’re using the overlay as a guide for placement while bringing your own observation and technique to the actual rendering.
Complex subjects like hands, animals in motion, or architectural details become much less intimidating. You can study how the bones and muscles of a hand create its form, or how perspective works in a building’s facade, all while getting the proportions right from the start.
From Sketch to Paint: Using AR Across Different Media
AR drawing isn’t just for pencil sketches. Once you understand how to use the overlay, you can apply it to watercolor, acrylics, markers, or any other medium you work with.
For painting, the process usually starts with a light sketch. You use the AR overlay to map out your composition and major shapes in pencil, then remove the phone setup and start painting. Some artists keep checking back with the overlay as they paint to verify proportions in different areas.
Watercolor artists find AR particularly helpful because watercolor is less forgiving than pencil. You can’t easily erase or cover up mistakes. Getting the drawing right before you start painting saves a lot of frustration and wasted paper.
The key is understanding that the AR overlay is strongest at the beginning of your process. It helps you establish proportions and composition. As you move into the rendering phase, whether that’s shading, painting, or adding details, you rely more on your own observation and artistic choices.
Building Skills While Using AR Tools
There’s a common question artists ask: if you use AR to help with proportions, are you actually learning anything? The answer is absolutely yes, but it depends on how you use the tool.
When you use AR drawing as a way to study relationships and train your eye, you’re actively building skills. Pay attention to what you’re seeing. Notice how far apart the eyes are as a proportion of the total head width. Observe how the shadow side of a face relates to the light side.
Try this exercise: draw something with the AR overlay, then immediately try to draw the same subject from memory or from the reference without the overlay. You’ll be surprised how much more accurate your freehand drawing becomes. The AR experience taught your brain what to look for.
Artists use Da Vinci Eye as a practice tool for this reason. They’re using it to learn proportions and relationships that they can then apply to their freehand work, building toward drawing without the overlay at all.
Common Mistakes When Starting with AR Drawing
The biggest mistake beginners make is relying on the overlay for everything. They keep the opacity at 100% and try to trace every single line exactly. This turns drawing into a mechanical process instead of a learning experience.
Lower that opacity. Start with it higher if you need to for the initial structure, but drag the opacity slider down as you work. You should be looking at your own marks as much as you’re looking at the reference.
Another issue is poor phone positioning. If your phone isn’t stable or if the angle is off, the overlay won’t match your paper accurately. This creates confusion and actually makes proportions harder instead of easier. Take time to get your setup right before you start drawing.
Don’t forget to look at the actual reference image on its own too. The overlay shows you where things go, but you still need to observe values, colors, and details in the reference itself. Switch back and forth between the overlay view in Da Vinci Eye and just looking at your reference normally.
Finally, some artists never challenge themselves to draw without the AR tool. Make sure you’re regularly practicing freehand as well. The goal is to use AR drawing to build skills that make you a better artist overall, not to become dependent on the technology.
Start drawing with Da Vinci Eye